EXCAP Docs
Three Modes in EXCAP
Our product supports three modes. The first two modes are IMU mode and IMU+Magnetometer mode. Almost all IMU Full-body Trackers have this function. IMU is the basis for spatial position calculation, while Magnetometer is an auxiliary tool for correcting direction. The third mode is the hybrid mode of IMU+Vision. In this mode, the camera is used as an auxiliary device to correct IMU.
Modes 1/2: IMU / IMU+Magnetometer Mode
Using the IMU or the IMU + Magnetometer mode is quite straightforward. When no camera is connected, these modes are enabled by default.
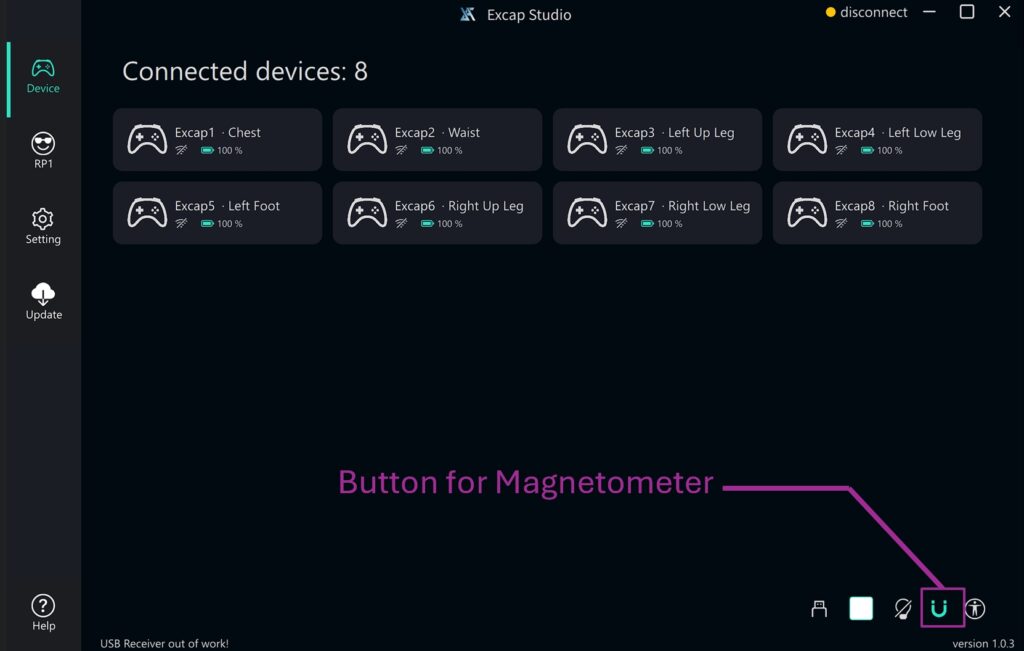
Open Excap Studio, connect all the trackers, and then use the button located at the bottom-right corner of the interface to toggle the magnetometer on or off.
Step 1: Wear Trackers
This step is very important .
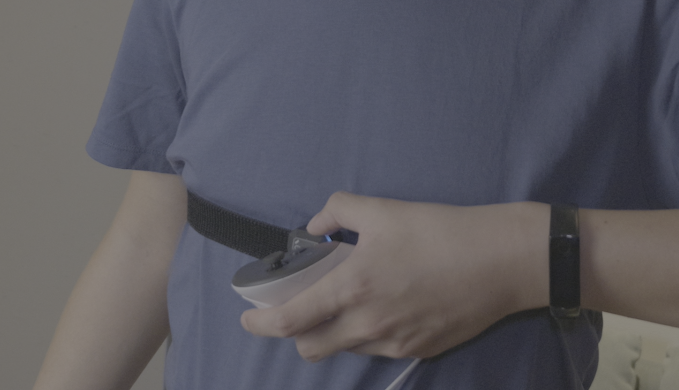
- The tracker’s switch must be facing up.
- The tracker be the front of your body.
- Make sure the tracker doesn’t slide on you as much as possible.
- 6/8 points mode are both supported, foots trackers are optional, if you do not need to move your ankles.
Step 2: Calibrate posture
Check your tracker is mounted as in front of your body as possible.
1. Reset with A-Pose
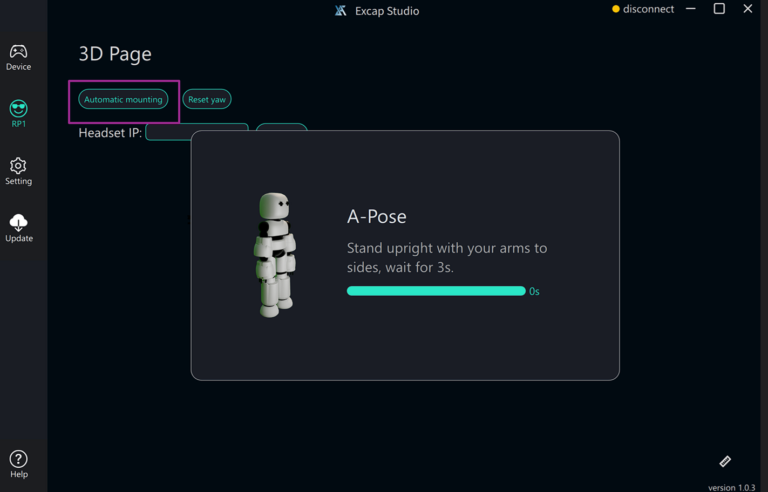
Using A-Pose, you can complete the calibration by standing for 3 seconds by one step. There two ways to trig Reset A-pose calibration.
- Press the button shortly on the Chest tracker. (less than 1 second, or the tracker may be turned off)
- Click the Auto-mounting button on the Excap-Studio.
2. Reset yaw
This calibration help you to calibrate the yaw axis dift cause by imu drift or inhomogeneous magnetic field. It will set all the tracker to the same toward as the headset.
There two ways to trig Reset yaw calibration.
- Press the button shortly on the Waist tracker. (less than 1 second, or the tracker may be turned off)
- Click the Reset yaw button on the Excap-Studio.
Step 3: Adjust bone length
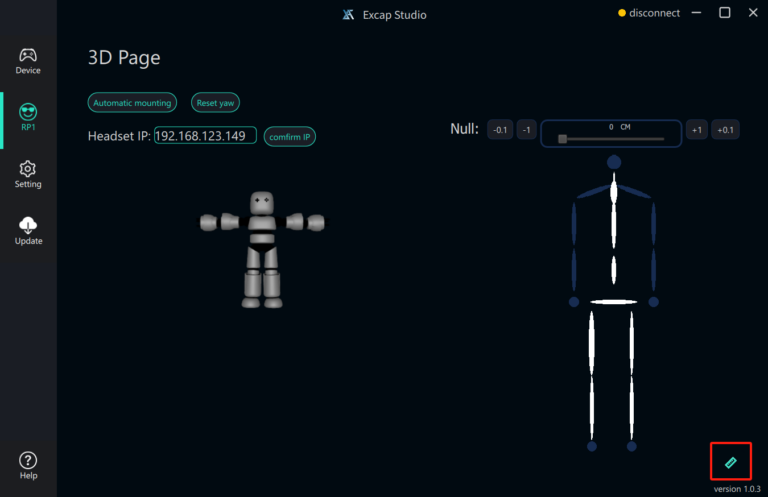
You can adjust it when you feel the bone length is not proper. It is recommended to adjust the bone length until the virtual foot tracker in steamVR/VRChat close to your foots than ankles. The adjustment will be saved autoly.
The pros and cons of turning on the magnetometer
By turning on the magnetometer, the IMU gains an additional source of directional reference, which can help provide more stable orientation tracking. However, activating the magnetometer may not always result in the best user experience. Consider the following factors before deciding whether to use it:
- Environmental Interference:
The presence of metallic objects or strong magnetic fields in your environment can distort the Earth’s magnetic field. These distortions can lead to inaccurate or skewed orientation readings. In such cases, relying solely on the IMU’s internal measurements might yield more consistent and reliable tracking results.
Mode 3: IMU+Vision Mode
Step 1: Connecting Vision Camera
We strongly recommend you to finish imu/imu+magnetometer mode setup before you try this mode.
Before Reading: this is a document provided for internal testing users, not the final solution when EXCAP ships to users. We have already made some optimizations:
1 Disable the installation of third-party apps in HMD
2 Use Wi Fi camera
3 Support the installation of visual calibration algorithms in other locations such as tables.
example1 quest3:
Physical Connections:
You will need to mount a camera onto the headset and connect a Type-C data cable to the HMD.
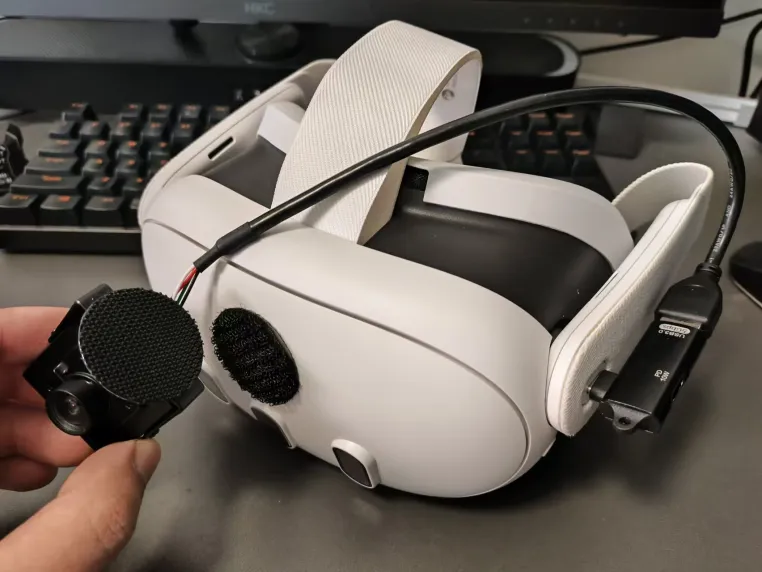
- The camera should be set 90 degrees toward the floor.
- The white connector should be close to the headset.
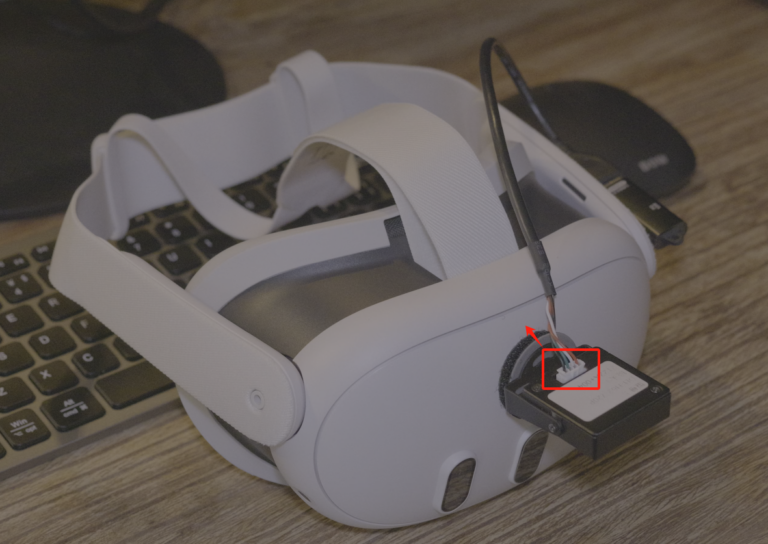
Software Installation Inside the HMD:
In addition, you must download and install the appropriate software within the HMD. This software enables the headset’s internal systems to stream tracking data back to Excap Studio on your PC.
- Turn on the developer mode.
- Use Sidequest to install the third-party app USB Camera_11.2.0_APKPure.apk.
- Plug the camera into the headset, Open the USB Camera app, the camera will be detected.
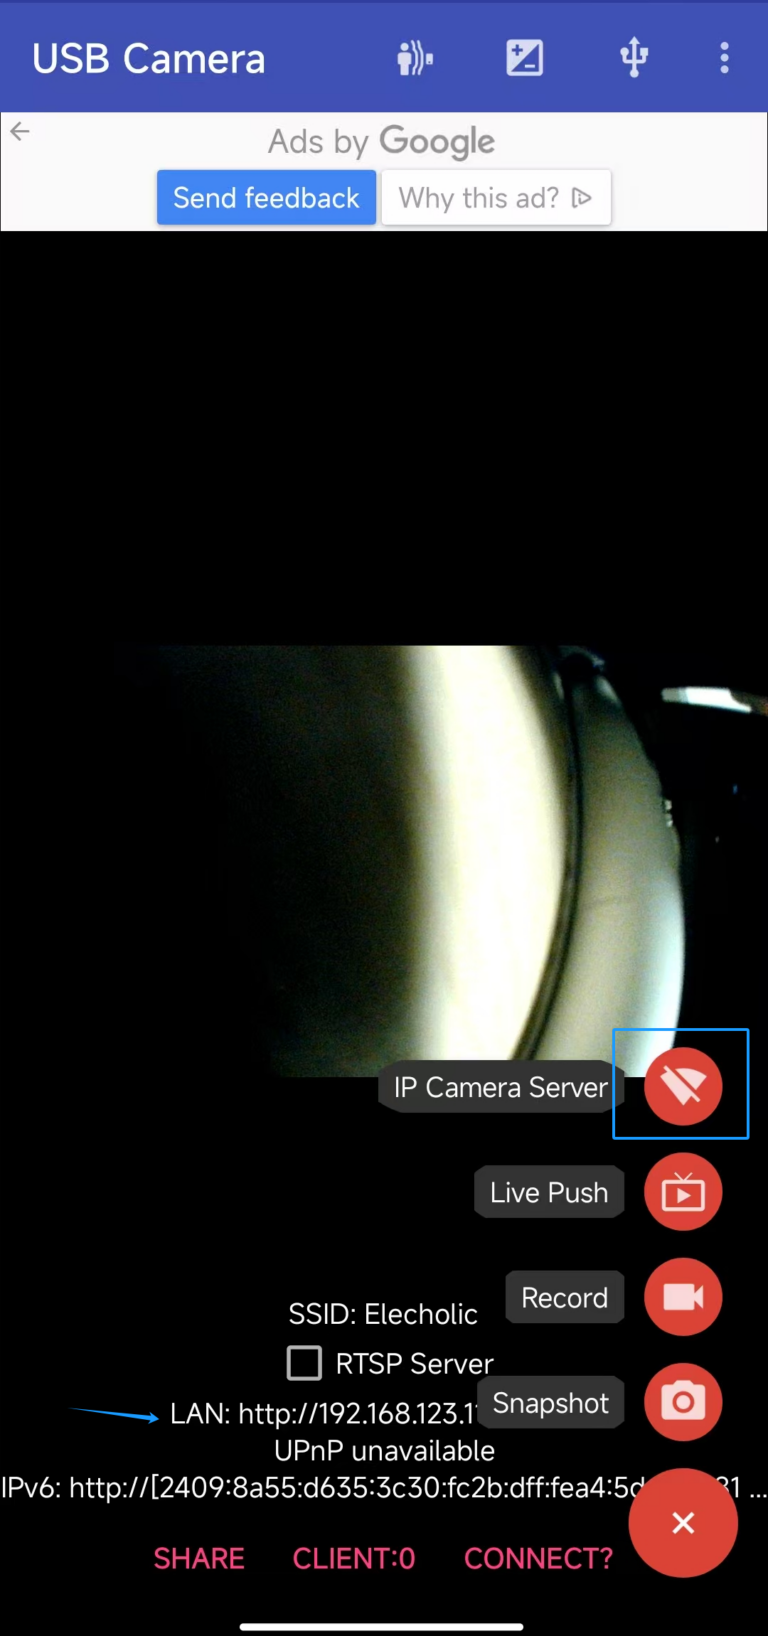
- Enable the IP Camera Server. Get your headset ip from LAN.
- Adjustment: Rotate the camera from left to right until your body is in the middle of the video.
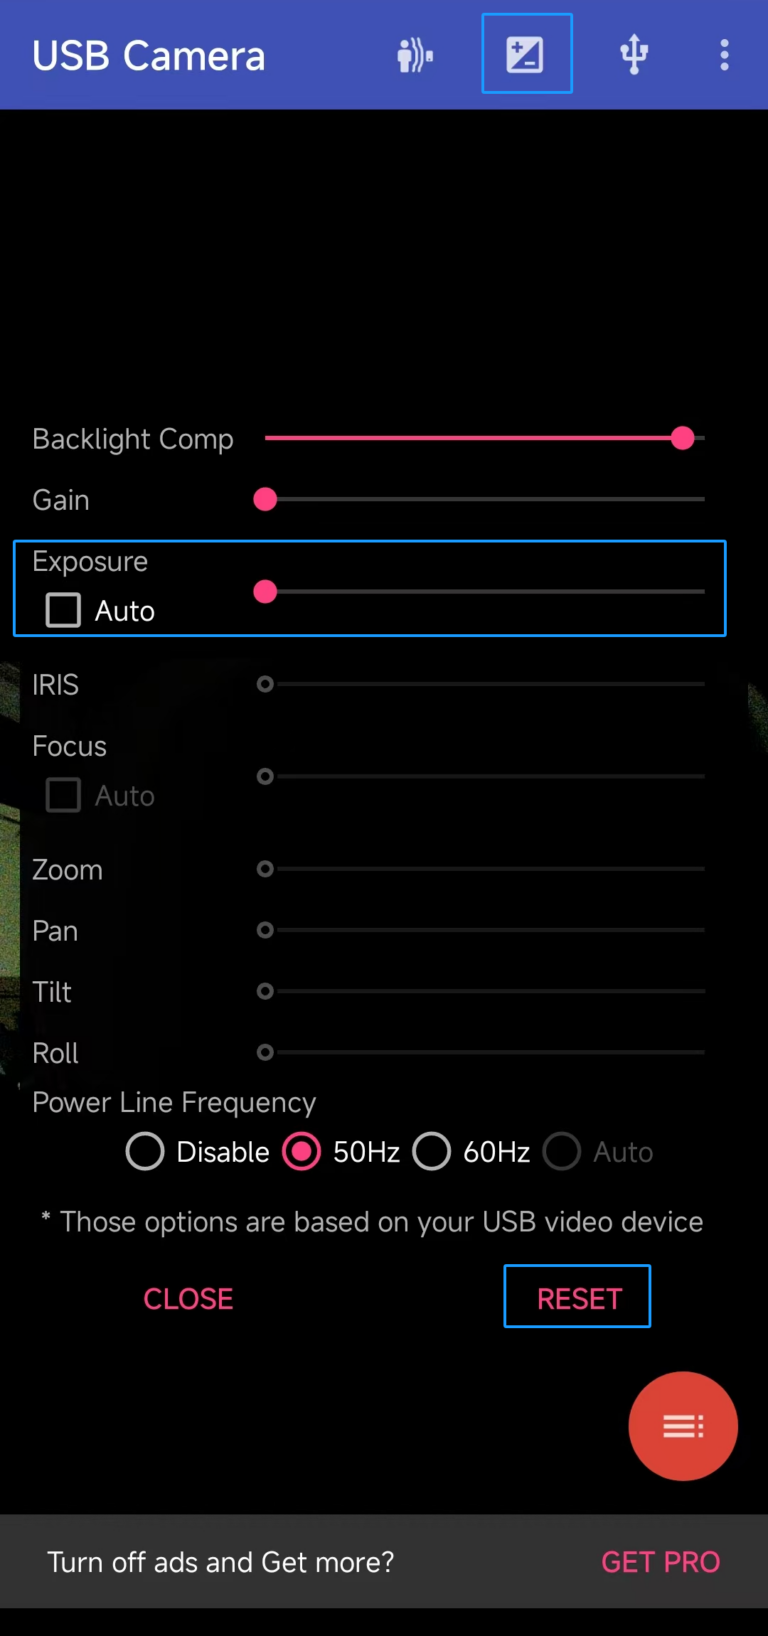
- The camera works best at the lowest-exposure state. So it is set lowest-exposure defaultly. If you touch it by mistake, you can reset it and adjust Exposure to lowest again.
Step 2: Connect to Excap Studio
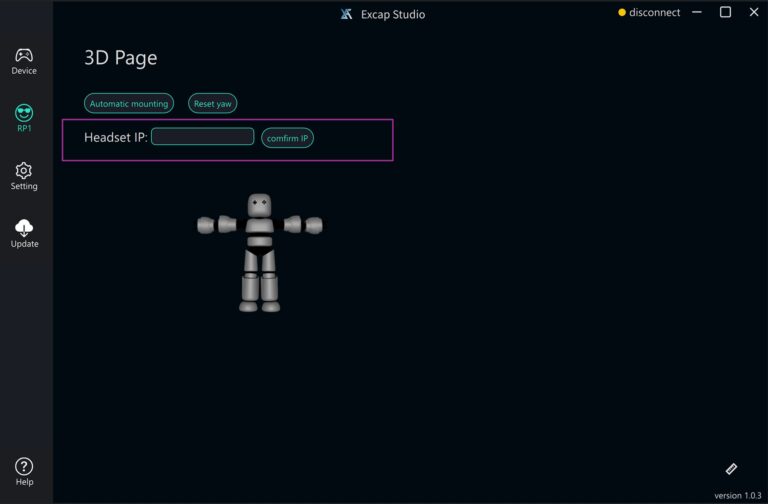
Get the IP address of the HMD from the USB Camera software and enter it into Excap studio:
eg. 192.168.123.149
Make sure the IP Camera Server is on, then click the confirm button on Excap Studio, then you will see:
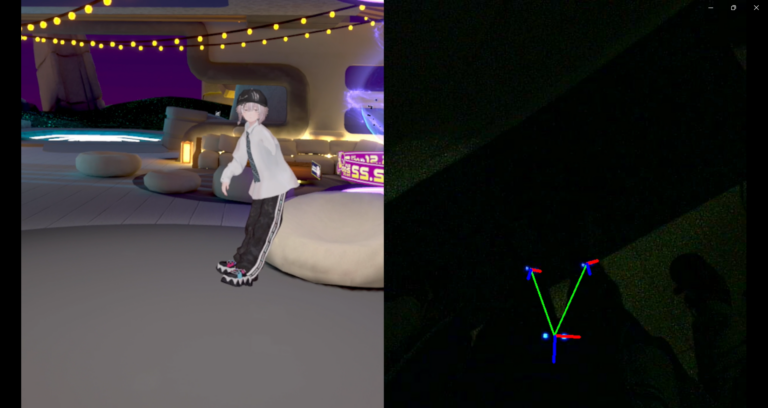
- The video is showed on a new window.
- Only your ankes and waist trackers’ RGB LED is on.
Try confirm again if some RGB LEDs do not work. Or restart the software.
We now only use 3 trackers’ RGB LEDs to calibrate all the trackers for an easy detection and a better experence. This may change in future with the improvement of agorithm.
After finishing setup, the vision system will begin to work. You will hear a sound “ding” when it detect 3 trackers.
Two poses will help you enjoy a non-drift FBT.
- When you are standing up, keep your head level and gently push your butt back until you hear a sound “ding”.
- When you are sitting or lying, lift your head gently until you hear a sound “ding”.
example2: Valve Index
For a wired pcvr, usb-camera should be plugged in PC USB-A direcly.
Step1: Input number ‘0’ to “Headset IP ” on the excap_studio software if you only have one camera on your PC. Or try other number like ‘1’.
Step2: click confirm button. Then it will connect.
- The video is showed on a new window.
- Only your ankes and waist trackers’ RGB LED is on.
trouble shooting
- If the camera offline or disconnected, you have to restart Excap_Studio for this version. (Can be optimized later)
- If the tracker get high delay, you have to restart Excap_Studio for this version. (Can be optimized later)
- If the camera have detect the trackers, but no calibration happen, you have to restart Excap_Studio for this version. (Can be optimized later)
